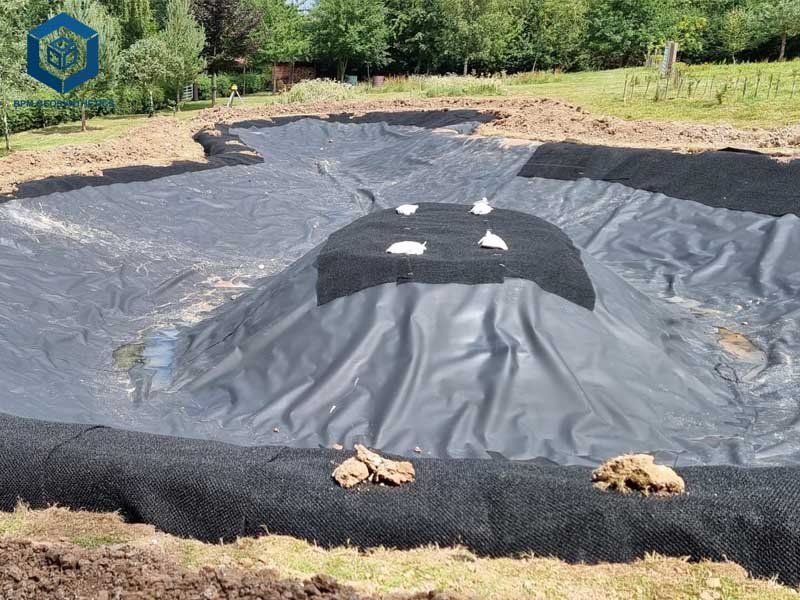
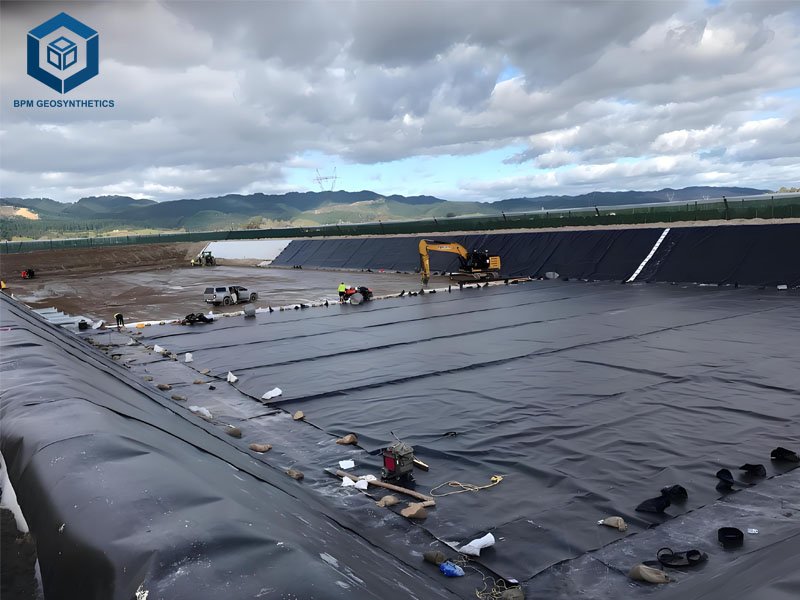
Geomembrana liners are the unsung heroes of countless containment systems, from tranquil backyard ponds and serene aquatic features to critical industrial lagoons and agricultural reservoirs. Their impermeability is vital for preventing water loss, controlling seepage, and maintaining environmental integrity. However, even the most robust Geomembranas can suffer damage, often leading to frustrating leaks that compromise their function. When damage occurs underwater, the prospect of repair can seem daunting, leading many to consider costly draining or professional intervention. Yet, with the right knowledge, tools, and techniques, many common types of underwater Geomembrana damage can be effectively addressed through Do-It-Yourself (DIY) solutions Underwater Geomembrana Damage Repair.
This comprehensive guide delves into the practical aspects of identifying, preparing for, and executing underwater repairs on various types of Geomembrana liners.
1. Understanding Your Geomembrana: The First Step in Repair
Before attempting any repair, it is crucial to identify the type of Geomembrana material used in your pond or containment system. Different materials react differently to adhesives and patching techniques. The most common types include:
- HDPE (High-Density Polyethylene):Known for its rigidity and chemical resistance, HDPE is durable but can be challenging to patch underwater without specialized heat welding equipment, making adhesive-based DIY repairs more critical.
- LLDPE (Linear Low-Density Polyethylene):More flexible and puncture-resistant than HDPE, LLDPE is generally easier to work with for repairs, especially for adhesive patching.
- PVC (Polyvinyl Chloride):Highly flexible and relatively inexpensive, PVC is often found in smaller, older ponds. It is generally receptive to adhesive-based repairs.
- EPDM (Ethylene Propylene Diene Monomer Rubber):A synthetic rubber often used for its flexibility and UV resistance, EPDM is very forgiving for adhesive repairs.
Identifying your liner type (if not known from original documentation) might involve checking purchase records or, for older installations, carefully examining a small, dry edge of the liner. HDPE and LLDPE will feel more plastic-like, while EPDM has a distinct rubbery feel. PVC is often thinner and more pliable than PE liners.
2. Identifying the Leak: The Needle in the Haystack
Locating an underwater leak can be the most challenging part of the repair process. Water can travel surprisingly far along the underside of a liner before surfacing, making the actual breach difficult to pinpoint. Patience and systematic investigation are key.
Common Methods for Leak Detection:
The “Turn Off and Observe” Method:
- Procedure:Turn off all pumps, waterfalls, and filtration systems. Allow the water level to drop naturally. Mark the water level at regular intervals (e.g., every few hours or daily).
- Insight:If the water level stabilizes at a certain point, the leak is likely at or just above that level. This significantly narrows down your search area. If it continues to drop, the leak is likely deeper in the pond basin.
- Data Point:A typical pond may lose 0.25 to 0.5 inches per day due to evaporation, splashing, or absorption by plants. Anything significantly more than this indicates a leak.
The “Milk or Non-Toxic Dye” Test:
- Procedure:Once the water level has stabilized at the approximate leak height, carefully add a small amount of non-toxic pond dye or milk near suspected leak areas (e.g., around rocks, folds, or edges).
- Insight:The dye or milk will be drawn towards the leak, creating a visible current that indicates the exact location. This method is particularly effective for small punctures or tears.
- Data Point:Using a small, controlled amount (e.g., 1/2 cup of milk for a medium-sized pond) is usually sufficient. Non-toxic dyes designed for ponds are readily available and safe for aquatic life.
The “Visual and Tactile Inspection” Method:
- Procedure:Once the approximate leak depth is known, put on swim gear or waders and meticulously inspect the liner’s surface, paying close attention to folds, seams, and areas around rocks or plants. Run your hands gently along the liner, feeling for abrasions, punctures, or weakened spots.
- Insight:Many leaks are caused by sharp objects (rocks, debris), animal activity (rodents, insects), or sometimes even accidental damage during pond maintenance. Small pinholes can be very hard to see but might be felt.
- Data Point:Over 70% of pond liner leaks are attributed to physical damage from external sources or improper installation.
The “Bucket Test” (for system-wide leaks):
- Procedure:Fill a 5-gallon bucket with pond water and place it next to the pond. Mark the water level in both the bucket and the pond. After 24-48 hours, compare the water loss.
- Insight:If the pond loses more water than the bucket, the leak is within the pond liner itself. If water loss is similar, the issue might be evaporation, splashes, or leaks in external features like waterfalls or plumbing, not the main liner.
3. Underwater Geomembrana Damage Repair: Essential Steps for Success
Once the leak is located, thorough preparation is crucial for a durable repair. Rushing this stage can lead to patch failure.
Safety First: Underwater Geomembrana Damage Repair – Prioritizing Well-being
Working in or around water carries inherent risks. Always prioritize safety:
- Electrical Disconnection:Turn off all electrical components (pumps, lights, filters) to prevent electric shock hazards.
- Water Depth:For deeper ponds, consider partially draining the pond to bring the leak closer to the surface if feasible, or ensure you are a confident swimmer with appropriate diving gear if necessary. Never attempt deep repairs alone.
- Clear the Area:Remove any unstable rocks, slippery algae, or debris from the immediate repair zone.
- Ventilation (if using strong adhesives):While underwater, fumes are less of an issue, but be mindful of any product warnings for respiratory protection if working partially exposed or in confined spaces.
- Gloves and Eye Protection:Always wear appropriate chemical-resistant gloves (e.g., nitrile) and eye protection when handling adhesives or primers, even underwater, to prevent skin and eye irritation.
Cleaning the Damaged Area: Underwater Geomembrana Damage Repair – The Foundation of Adhesion
This is arguably the most critical step for underwater repairs. Adhesives require a clean, contaminant-free surface for proper bonding.
- Remove Algae and Debris:Gently scrub the area around the leak (at least 6-12 inches beyond the damage in all directions) with a soft brush or abrasive pad (e.g., Scotch-Brite) to remove algae, biofilm, and loose debris.
- Rinse Thoroughly:Use a small amount of clean water from a spray bottle or a gentle flow from a hose to rinse away loosened contaminants. Avoid excessive agitation that might spread debris.
- Drying (Partial):While complete drying underwater is impossible, many modern underwater adhesives are designed to bond in wet conditions. However, removing loose water from the immediate patch area with a clean cloth or sponge can improve initial contact. Some professional-grade underwater epoxies specifically require a wet environment for proper cure.


4. Choosing the Right DIY Underwater Geomembrana Damage Repair Kit and Adhesives
The success of your underwater repair heavily depends on selecting the appropriate patch material and adhesive, ensuring compatibility with your existing Geomembrana.
Underwater Geomembrana Damage Repair – Common Repair Materials and Their Applications:
Underwater Geomembrana Damage Repair – Butyl Rubber Repair Tape/Patches:
- Compatibility:Excellent for EPDM and often suitable for PVC and some reinforced polypropylenes (RPP).
- Characteristics:These are typically self-adhesive tapes or pre-cut patches. They are very flexible, conform well to irregular surfaces, and are designed to bond in wet conditions. Many are fish-safe.
- Application:Ideal for small to medium-sized tears and punctures. Applied by pressing firmly onto the cleaned liner.
- Example Products:Firestone QuickSeam Pond Liner Repair Kits, Tite Seal Pond Liner Repair Tape.
Underwater Geomembrana Damage Repair – Specialized Underwater Epoxy Adhesives:
- Compatibility:Versatile, often bonding well to PVC, concrete, fiberglass, and even some polyethylene types (though direct bonding to untreated polyethylene is generally weaker than with dedicated PE repair solutions). Best for small holes or sealing around penetrations.
- Characteristics:Two-part epoxies that mix and cure underwater. They form a strong, rigid, and durable bond. Many are formulated to be fish-safe.
- Application:Dispensed and mixed underwater or just above the surface, then applied directly to the leak or used to adhere a patch. Curing times can range from hours to days depending on water temperature.
- Example Products:AquaBond® Underwater Epoxy Repair Adhesives (UW-5000, UW-5200), often used for swimming pools but applicable to pond liners.
Underwater Geomembrana Damage Repair – Polyethylene (PE) Repair Tapes/Patches (for HDPE/LLDPE):
- Compatibility:Specifically designed for HDPE and LLDPE liners.
- Characteristics:These often involve a pressure-sensitive adhesive. While heat welding is the gold standard for PE liners, some specialized PE tapes are designed for temporary or emergency underwater repairs. For more permanent underwater HDPE repair without welding, a dedicated HDPE patch material might be bonded with a strong, compatible adhesive.
- Application:Requires a very clean surface. Some might require a primer for optimal adhesion.
- Data Point:For HDPE, cold-applied patches are generally considered temporary. For permanent, high-strength repairs on HDPE, heat fusion welding (which is not a DIY underwater technique) is typically required after draining. However, advancements in adhesives mean some specialized high-bond tapes can offer significant durability for DIY.
Underwater Geomembrana Damage Repair – Polyurethane Sealants:
- Compatibility:Good for various materials, including PVC, EPDM, and sometimes used for minor touch-ups on PE.
- Characteristics:Flexible, durable, and can be applied in wet conditions. Excellent for sealing around fittings or small punctures.
- Application:Applied directly from a tube. Needs sufficient cure time.
- Example:Specific pond-safe polyurethane sealants.
Underwater Geomembrana Damage Repair – Considerations for Adhesive Selection:
- Material Compatibility:Always ensure the adhesive and patch material are compatible with your existing Geomembrana. Using the wrong type can lead to weak bonds and repeated failures.
- Water Temperature:Some adhesives have temperature limitations for application and curing. For cold water (<50°F), slow-cure epoxies might be necessary, and curing times can be significantly extended (e.g., up to 72 hours for full cure).
- Fish and Plant Safety:Verify that the product is explicitly labeled as “pond-safe” or “fish-safe” to protect your aquatic ecosystem. Avoid general-purpose glues or sealants not designed for aquatic environments.
- Curing Time:Understand the curing time before refilling or resuming normal pond operations. Rushing this can compromise the repair.
5. DIY Underwater Geomembrana Damage Repair: Step-by-Step Execution
Once you have identified the leak, prepared the area, and selected your materials, you can proceed with the repair. The general steps are similar, but specific techniques may vary slightly based on the type of patch and adhesive.
Technique 1: Using Self-Adhesive Patches/Tapes (Common for EPDM, PVC, LLDPE)
- Prepare the Patch:Cut a patch from your chosen repair material. It should be at least 6 inches larger than the hole in all directions. Rounding the corners of the patch can help prevent lifting.
- Clean the Patch (if necessary):Some patches come with a protective backing. If not, ensure the adhesive side is clean.
- Apply Primer (if required):For some EPDM or LLDPE repair tapes, a compatible primer is applied to the liner surface before the patch. This enhances adhesion significantly. Apply the primer evenly to the cleaned area around the leak. Allow it to become “tacky” if instructed by the manufacturer.
- Position the Patch:Carefully align the patch over the cleaned and, if applicable, primed area, ensuring it completely covers the damage with ample overlap.
- Firmly Press and Roll:Once positioned, press the patch firmly onto the liner, working from the center outwards to push out any trapped water or air bubbles. Use a hand roller or a smooth, blunt object to apply even pressure across the entire patch, especially the edges. This ensures maximum contact and adhesion.
- Edge Sealing (Optional but Recommended):For extra security, apply a bead of pond-safe sealant (like a polyurethane or specialized silicone) around the perimeter of the patch to create a watertight seal and prevent edge lifting.
Technique 2: Using Two-Part Underwater Epoxy (Versatile for small holes, cracks, and sealing)
- Prepare the Epoxy:For cartridge-based epoxies, attach the mixing nozzle. For tub/jar epoxies, scoop equal parts of the two components onto a clean, non-reactive surface (e.g., a plastic sheet or polyethylene film, as epoxy won’t stick to it). Mix thoroughly until a uniform color is achieved. Work quickly, as these epoxies have limited working times, especially in warmer water.
- Apply Directly to Leak (Small Holes/Cracks):For very small punctures or hairline cracks, apply the mixed epoxy directly into and over the damaged area. Use a spreading tool (e.g., a plastic spreader or a gloved finger) to work the epoxy into the void and smooth it over the surrounding liner, feathering the edges.
- Apply with a Patch (Larger Holes/Tears or Reinforcement):For larger damage, cut a patch (e.g., from a compatible Geomembrana scrap or fiberglass mesh). Apply a generous layer of mixed epoxy to the back of the patch. Position the patch over the cleaned leak area and firmly press it down, working out water and air. Apply another thin layer of epoxy over the top of the patch and feather the edges for a strong, smooth finish.
- Curing:Allow the epoxy to cure for the recommended time as per manufacturer instructions. This could range from 4 hours to 72 hours, depending on the product and water temperature. Avoid disturbing the repair during this period.
Technique 3: Underwater Welding (Advanced DIY for HDPE/LLDPE – Limited Scope)
While professional Geomembrana welding requires specialized hot-wedge or extrusion welders, some highly skilled DIYers might attempt hot-air gun repairs for exposed HDPE/LLDPE, or very carefully for partially drained sections. However, this is extremely challenging and generally not recommended for underwater repairs due to the immediate cooling effect of water, inability to properly heat the material, and inherent safety risks (electrical hazards). For underwater HDPE/LLDPE, adhesive patches with compatible, high-bond primers are the most realistic DIY approach, though they may not achieve the same long-term strength as professional fusion welds.
6. Common Mistakes to Avoid During Underwater Repair
Even with the right materials and techniques, common errors can compromise the repair.
- Inadequate Cleaning:This is the most frequent cause of patch failure. Dirt, algae, or biofilm prevent adhesives from bonding properly. A visibly clean surface isn’t enough; it must be free of microscopic contaminants.
- Using Non-Pond-Safe Materials:Household adhesives, sealants, or tapes can contain chemicals harmful to fish, plants, and beneficial bacteria. Always use products explicitly labeled safe for aquatic environments.
- Insufficient Overlap:The patch must extend well beyond the damaged area (at least 3-6 inches on all sides) to provide sufficient bonding surface and distribute stress.
- Trapping Air or Water:Any trapped air or water bubbles under the patch will prevent proper adhesion and create weak points. Press firmly from the center outwards.
- Ignoring Temperature Limitations:Adhesives have optimal temperature ranges for application and curing. Applying them outside these ranges can lead to poor bonds or extended cure times. For instance, many glues struggle to cure in very cold water.
- Rushing the Cure Time:Allow the adhesive to fully cure according to the manufacturer’s instructions. Prematurely refilling or disturbing the area can dislodge the patch or weaken the bond.
- Misidentifying the Leak Source:Patching a spot that isn’t the actual leak will not solve the problem. Thorough leak detection is paramount.
- Attempting to Patch Large or Complex Damage:DIY repairs are best suited for small punctures, tears, or localized weak spots. Large rips, multiple complex leaks, or damage to critical structural areas (like major seams or pipe penetrations that are under significant pressure) often require professional expertise and specialized equipment (e.g., thermal welding for Geomembranas). Trying to DIY such extensive damage can lead to repeated failures and wasted resources.
7. Beyond the Patch: Long-Term Liner Health
Repairing a leak is a reactive solution. Proactive measures can significantly extend your Geomembrana’s lifespan and reduce the likelihood of future damage.
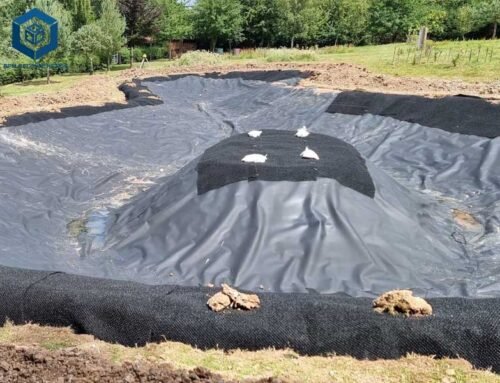
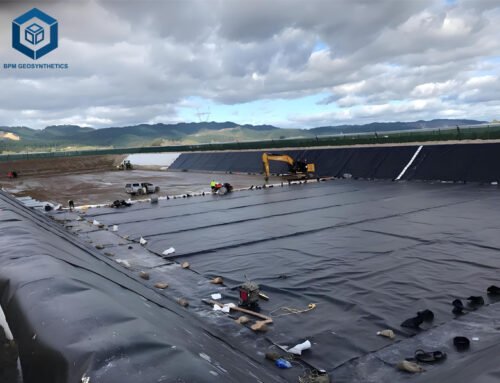
- Underlayment:For new installations or major renovations, installing a geotextile underlayment beneath the Geomembrana provides a protective cushion against sharp rocks, roots, and subgrade irregularities. This is one of the most effective preventive measures against punctures.
- Edge Protection:Securely anchor the liner at the edges using anchor trenches or mechanical fasteners. Protect exposed edges from UV degradation with soil, gravel, or decorative elements.
- Avoiding Sharp Objects:Be vigilant about removing any sharp objects (rocks, tools, broken glass) from the pond area, both in and out of the water. Avoid walking directly on exposed liner.
- Pruning Roots:Regularly inspect and prune any tree or shrub roots that could potentially grow towards or under the liner. Some aggressive root systems can penetrate even robust Geomembranas over time.
- Animal Control:If wildlife (e.g., raccoons, muskrats) are known to frequent the area, consider deterrents or physical barriers to prevent them from damaging the liner.
- Routine Inspection:Periodically visually inspect your pond liner, especially during seasonal cleanings. Early detection of small issues can prevent them from escalating into major leaks.


8. When to Call a Professional
While DIY Underwater Geomembrana Damage Repair are effective for many situations, it’s important to recognize when professional help is needed.
- Extensive Damage:Large tears (e.g., exceeding 12-18 inches), multiple widespread holes, or significant deterioration across a large area.
- Complex Geometries:Damage in highly intricate areas like waterfalls, stream beds, or complex pipe penetrations that require specialized sealing techniques.
- Critical Applications:For industrial containment (e.g., hazardous waste lagoons, large mining operations) where environmental consequences of failure are severe, professional repair is typically mandated.
- Hidden Leaks:If you’ve tried all DIY leak detection methods and still cannot find the source, professionals often have specialized equipment like electrical leak location (ELL) systems to pinpoint even microscopic breaches.
- Specific Liner Materials:For HDPE liners, a professional heat fusion weld offers a truly permanent and structurally sound repair that is difficult, if not impossible, to achieve with DIY underwater methods.
9. Conclusion: Empowering Your Pond’s Longevity
Addressing underwater Geomembrana liner damage can be a challenging but rewarding DIY project. By thoroughly understanding your liner material, systematically identifying the leak, meticulously preparing the repair site, and carefully selecting and applying the correct, pond-safe repair materials, you can effectively restore the integrity of your containment system. This not only saves significant costs associated with professional services or complete liner replacement but also empowers you with the knowledge to maintain your aquatic feature for years to come. Remember, data-driven decisions and adherence to best practices are the cornerstones of successful Geomembrana repair, ensuring that your DIY efforts result in a durable, reliable solution.
Any questions or inquiries, please contact BPM Geomembrane.
